I am sure that you have all seen these gorgeous bowls around. They are having a bit of an Instagram moment for sure and there are some really lovely examples around.
I think that my favourite aspect of a rope coil bowl is how easy they are to make.
They can look quite artisan depending on your choice of materials and they are actually useful. What's not to love!
Shall we have a go at making one? I used 6 mm (roughly 1/4 in) jute twine for mine and my sewing machine with a 'normal' universal needle handled it just fine. My bowl used 10 m which is around 10 yards of twine. It doesn't have to be exact.
You will also need some fabric scraps and a glue stick. I have put a felt circle in the middle of mine for the only reason that I didn't remove the tape because I didn't expect this to work as easily as it does. I just sort of had a go and suddenly it was fabulous! Of course by then, I couldn't get the tape off (and I certainly wasn't about to unpick!). So a felt circle it had to be.
Begin in the centre and fold your twine over on itself and coil a bit. set your machine to a zigzag stitch wide enough to go from piece of twine to piece of twine and start sewing and turning.
Go super slow and stop before you turn to save the needle from breaking.
As you sew, stop from time to time and wrap the twine with a scrap of fabric. I found that gluing this and then wrapping worked best. you cannot really plan this ahead and get it all done in advance because it is hard to imagine where the wraps will end up. just stop, wrap and then keep going.
When the base of your bowl is the size that you want, it is time to turn it into a bowl with sides.
As you can see from the result so far, it would work brilliantly as a mat too. I have some plans for my houseplants.
To shape the sides, turn the bowl so that the bit you have sewn so far rests against the side of your machine...
Keep sewing and wrapping until you wither run out of twine or the bowl has sides as high as you want.
I found some really nice lurex copper bias binding on eBay (I know it sounds perfectly ghastly in a 1970s sort of way) but it actually looks wonderful here and there against the roughness of the jute.
I have finished the end with a bit of Kraft-Tex paper. Leather would be fab too. Sorry but my potted succulent Enid wanted to be in every photo. Succulents are a bit like that. Don't get mixed up with them.
Here is Gladys. Succulents do seem to go with the bowl! Maybe a mat for the plants WILL be next! Gladys is still being acclimatised to my house and I am going to pot her on tomorrow. I found the little ceramic watering can at a charity shop and I think that it will be a perfect home for her.
Well anyway...thank you as always for stopping by and I do hope that you have enjoyed this.
I think that I may make more of these and if I do, you will be the first to know!
Love and hugs
Debbie
xx
I have a sweet tooth. Admission number one. I also have a body with a tendency to hold onto weight. Admission number two. The two things do NOT go together!
I have a background in medical sciences before I decided to make my way in life writing sewing patterns and with the degrees in biology, comes a special interest (and a masters degree) in food science. So let me clamber up onto my soap box and declare that I am not impressed by our attempts to reduce sugar by replacing it with other things which may not be any better for us in the long run. I don't pander to my taste buds. I am trying to reduce my need for sugar and that means to leave it out and to leave all sorts of other things out which mimic it.
Rant almost over I promise! But before we get onto the business of this week's post, I just want to say that 'natural' doesn't actually matter when it comes to sweeteners. honey, maple syrup or whatever else is all recognised and processed by your body the same way. Most honey has NO special health benefits!
I have recently had an enormous success with 25 kg (around 50 pounds) weight loss on the ketogenic diet - it is beyond the scope of this blog to go into that too much but if you Google it.....
But I still have a sweet tooth. Sorry. I need something to round off a meal and I don't want to add a sweetener - sugar is a no-no on this diet and the other 'artificial' options don't impress me much. I am very aware that fruit has sugar in it and that you will have to know your own carbohydrate tolerance limits if trying this but if you are not doing a strict diet but still want some thing healthy and delicious, make this five minute, TWO ingredient jam! That's right folks - two ingredients!
It looks like jam and behaves like jam and it is really delicious.
Okay, I have waxed lyrical ranted enough now and I expect that you would like to know how to go about harnessing this miracle for yourself?
You will need-
2 cups frozen blueberries
1 teaspoon gelatin
Grab a nice jar too
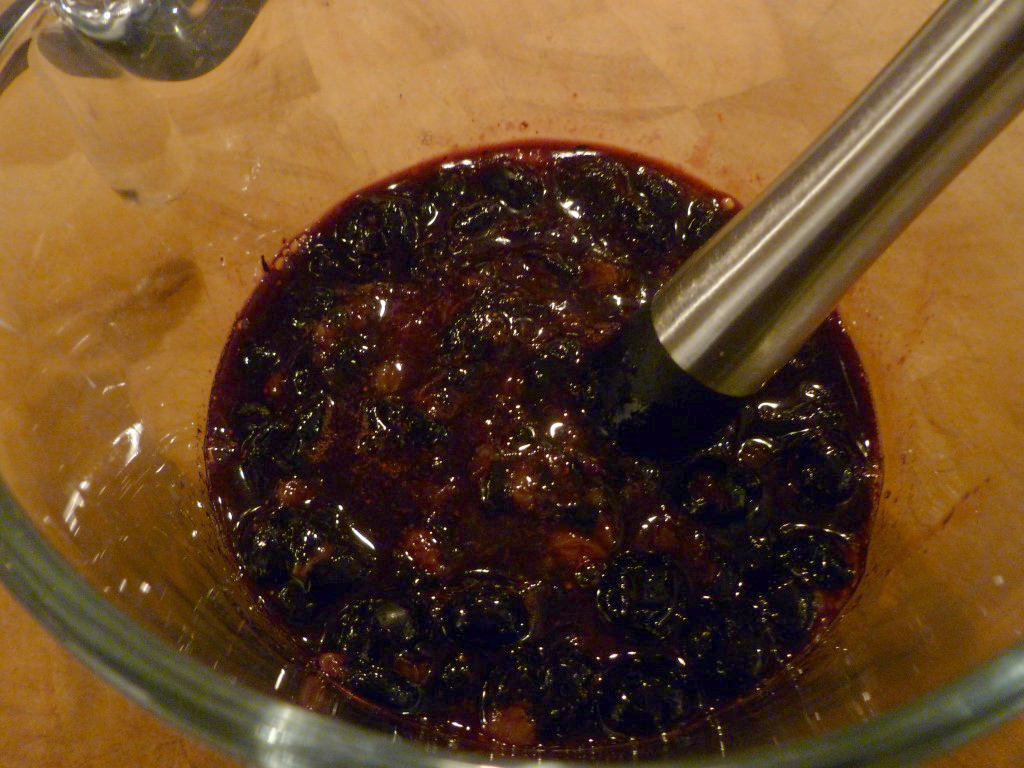
and a microwave proof jug. Oh, and a really weird piece of kit called a 'muddler' which is used in the cocktail industry for extracting the juicy goodness of fruit.
I bought mine here. If you haven't got one of these, anything that has a bit of a flat base and will stamp on the fruit like a winemaker will do the trick. Don't reach for the blender though. Jam is not puree. it should have juice plus bits of fruit in it and the colour should be deep and rich.
Here's how to go about it.....
Put your fruit into the microwave proof jug
Microwave on high for three minutes until the berries release their juice
'Muddle' to crush the fruit completely
Add the teaspoon of gelatin and the stir it in well. Microwave for another minute on high and then pour into the jar
That's actually it! Now sugar is a preservative too and it is part of the reason that jam doesn't go mouldy very quickly. This 'jam' doesn't have that so it does need to live in the fridge and it will keep about a week to ten days.
It is gorgeous on Keto style breads
and I love it on whipped cream. Swirl it into the cream and it is just sweet enough. About a tablespoon is right for me and it doesn't harm my progress.
If you do not have a microwave, you can also make it on the stove top. Simple simmer until the juice in the berries is released and
then add the gelatin and keep going for about another minute. Try not to stew the fruit and change its flavour using this method.
If you want a slightly runnier result, use less gelatin. If you want it thicker, you need slightly more. If you are vegetarian or vegan, use whatever substitute that you normally prefer. After a night in the fridge, you will be rewarded with the most delicate tasting jam and I have fooled children with this so I am arguing from an expert point of view here!
Get less sugar in your life and enjoy the real taste of food.
Thank you so much for stopping by. I hope that you find this delicious - if it isn't sweet enough, go cold turkey on sugar and try it again in a few weeks. You will be so surprised at the difference.
See you soon!
Love and hugs
Debbie
xxx
We are edging nearer to the big day now and I am thinking of more and more things to make for Christmas - things that should have been posted weeks ago if I was to get them all in!
Well I am just going to have to pick my favourites now because I estimate that at most, I have a couple more chances to squeeze in the Christmas pretties.
High on the favourites list has to be a versatile and lovely table mat. You can make one for each diner or just one for the centre of the table. It can be made larger or smaller and it can go under a vase or a candle or if you make a really big one, it can go under the turkey and provide the centre point for the whole shebang on the 25th.
This is another make which sends you to the scrap basket and only a few simple things are needed. So, without further ado...
Gather these supplies:
-FQ grey linen
-FQ some thing nice for the backing fabric
-FQ #279 80/20 cotton mix wadding (Vlieseline)
-scraps of red, green and dark grey fabrics
-medium sized heart shaped cookie cutter
-large plate or something else round that has about 33cm (13") diameter
-black and white bias binding.
-water soluble marker
-dark grey thread (FME) and a thread to match the linen (FMQ)
-your usual sewing and quilting needs including a darning foot for your sewing machine.
-medium embroidery hoop
-glue stick
This make includes free motion embroidery (FME) and free motion quilting (FMQ) don't worry, they are easy and most modern machines can do it. You will need the darning foot and to set your machine up properly. Check your manual for this because they are all different but with the same principle.
Begin by preparing the grey linen top using your large round object and the water soluble marker. The idea is to get the size that you want and draw it on but don't cut it out just yet....
Next lay the marked linen face up onto the wadding and pin....
Time to prepare the applique. Now you have a bit of choice here. You can really cram the motifs in or you can leave some space. First cut some tree trunks from the dark grey. I have used four and they are no particular size - about thumb size should do it. Lay them onto the linen circle about 2.5cm (1") in from the edge.....
Next go to the green scraps and cut triangles. Here again, no particular rules. Just make sure that they look okay with your trunks. Mine are a bit wonky and I am happy with that. Trim if you need to and then put them over the top of the trunks....
Finally, cut the hearts from the red scraps using the cookie cutter as a template. I have made four of these too. Place them in between the trees and when you are happy with everything, glue the motifs into place with the glue stick......
Set your machine up for FME and remove the pins. Using the embroidery hoop upside down, find a starting point and put the hoop on....
Now using the dark grey thread, embroider around the motifs.
Go around twice and don't be too neat....
Aim to be just inside of the applique and leave the edges.
Embroider all of the motifs in this way and then snip away the loose threads so that they look neat. Here is what you have now....
TIP: FME likes to have a bit of thickness to it and that is why this project is embroidered with the wadding under the linen. The hoop gives you something to steer by and stops puckering.
The next step is to quilt the mat and we will keep the darning foot on and keep the machine set up the same way. this time, we will use a simple meandering stitch and go all around the motifs.
Lay the backing fabric face down and pin the top onto it. I use the hoop for this bit to but you can of course leave it off if you prefer. If you do leave the hoop off, ensure that you keep all three layers nice and tight to avoid puckering on the back.
Just to show you before we get going, this is the pattern that you are after....
Use the lighter grey thread and start somewhere and meander!
By the way, I have a lighter background of red and ivory so I am using an ivory thread in the bobbin to match. This may feel like a bit of a faff but it is well worth it in terms of style.
Anyway, move the mat around gently and smoothly and quilt with a free form meander. Go up to a motif but not over it. When you have finished the quilting, the motifs will stand out a bit...
TIP: this is not a stitch that I would use to quilt a whole quilt because it is rather stiff due to all the thread used. You would quickly loose the squashiness of the quilt. You will see what I mean when the mat is finished. It is quite firm.
NOW it is time to cut the circle out! Do this, trimming all three layers.....
Keep the circle as neat as possible
Binding comes next. I have used my absolute favourite-right-now black and white binding. A nice red and white stripe to make a candy cane edge would be a nice alternative. And the same coloured linen as the top looks fabulous and doesn't frame it so much so that the applique stands out more.
Begin by attaching the binding to the top by machine like this....
Then finish it off by hand on the back....
There we go! A mat like this is easy and quick to make, it is fat quarter friendly and it would be fabulous as a gift.
I hope that I can find another window before the big day to put one more pattern in before the big day....I have in mind a cute Scandinavian style gnome.
Oh and of course before I go, you can get Vlieseline products (this and others that you cannot possibly live witghout at www.vlieseline.com Ph 01453883581 crafts@stockistenquiries.co.uk
Thank you for stopping by and I hope that you have enjoyed this pattern.
Love and hugs
Debbie