Tuesday, 1 March 2016

Create-a-Pincushion

The very good fairy who brings craft things to our house (trust me that is what I have told my husband and I would be greatly obliged to you if you keep up the story when he rings you to check)....any way, that good fairy has brought me a cutie pie from Clover this time.


It is their dinky little Create-a-Pincushion! It would be quite rude to ignore it so I thought that I would do as directed and get creating!

I also, by happy accident, happened to have some really pretty Cloud 9 fabrics. I am using one from the Park Life collection. 


The great thing about the pincushion to be is that if the top gets a bit nasty or you just get sick of it, you can change the top for another one entirely. There is no gluing so no mess either.


What keeps everything in place is a secure silicone ring and then an acrylic sleeve over the top of that. You can see the silicon ring here...


And if I deconstruct the whole thing like this....


The idea is that you get some fabric and then stuff the pin cushion, put the fabric over the top, trim and then put the sleeve over the top - et voilĂ ! you have a pin cushion. There are some really comprehensive instructions with the kit so it is not hard at all. So, let's have a look at this.


The instructions tell you that lawns and other very thin or thick (denim) fabrics are not so suitable but with a bit of prep, you can still use that coveted scrap of Liberty that you have been saving. Not much can be done for the very thick ones though so perhaps save them for something else. 
Once again, Vlieseline saves the day with a scrap of H630. The Cloud 9 fabrics are not very thick and it does take just the right amount of bulk to keep the whole show together. I pressed my square.....


And then fused the wadding to the wrong side....


And I have referred to the fabric as a 'scrap' - but what unit of measurement is that exactly? Well, this little make will not eat into your precious fabrics. I am using a piece 13.5 cm x 13.5 cm and it fits generously.

Next, fill the pincushion body really well with some polyester filling...
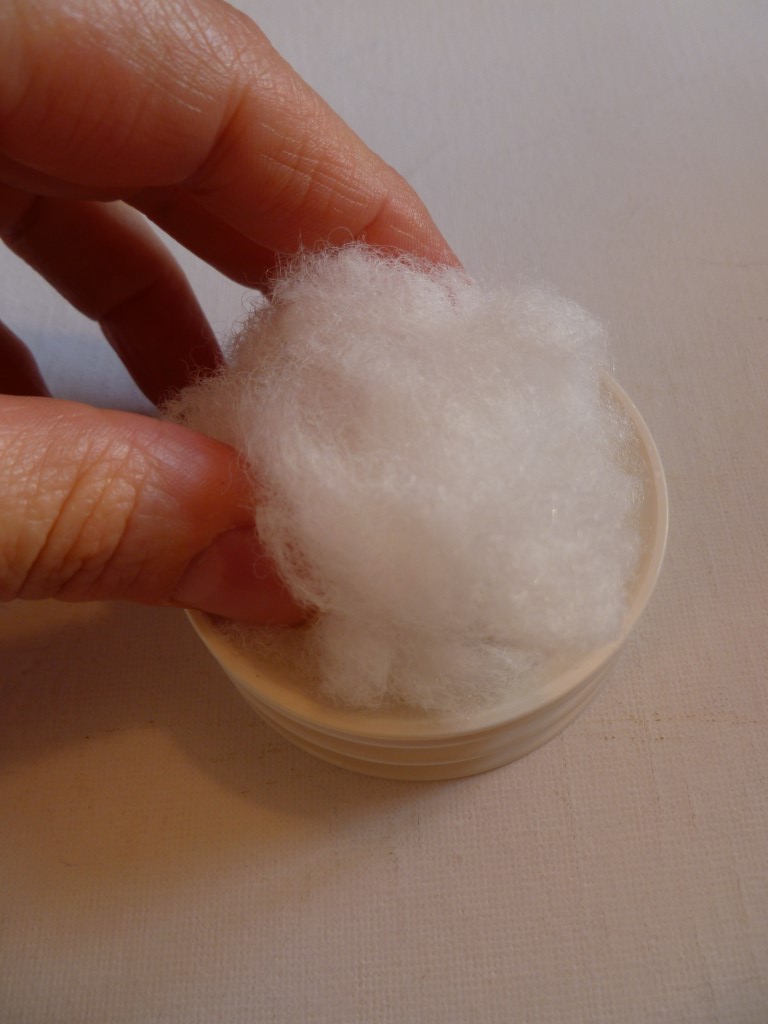


Sorry about the white-on-white photography - it is wildly fashionable so we all have to endure!
Lay the prepared fabric over the top.....


Slip the silicon ring on....


Gently pull the fabric to make it perfect and to get rid of any unsightly pleats. You can bring a motif into the picture this way too.
Trim just under the ring.....


Replace the sleeve....


This is a good make for embroidered or fancy fabrics too and you can let your imagination dictate.


So, now we need a proper list of where we can get our hands on all of these things don't we? Never fear, here it is....
Clover Create-a-Pincushion - groves@stockistenquiries.co.uk 01453 883581
Vlieseline - www.vlieseline.com Ph 01453883581 crafts@stockistenquiries.co.uk
Cloud 9 Fabric -  www.hantex.co.uk/mystockists 
Everything else is available from any good craft shop.

I like this product because it feels great quality. It is heavy and stable and it holds a lot of pins. You could make it with un-soaped steel wool inside too and then your pins with stay beautifully sharp. I am planning a few fro stocking fillers come Christmas time - sorry but it isn't as far away as we would like!

Thank you so much for stopping by and I hope that you have enjoyed this post

Love and hugs
Debbie
xxx


Disclaimer: this product was given to me in exchange for an honest review.


Thursday, 25 February 2016

Log cabin mat and runner

Last time, we made February's BOM after a bit of a drought and this week, as per my new rules from last year, we are going to make it into something. 


No more isolated blocks which either need to be duplicated and committed into a large quilt!


Here is the block again just to remind you and if you scroll down, you will find the post right under this one. Otherwise, look in the drop down menu under the main title.


This is a great block, easy for beginners because you don't have to match super accurately and I hope that you all enjoyed my little trick of strip piecing. I thought that a runner and a little mat might be something nice to make with it too so how do we go about that?


Well the first thing to do is to gather some supplies. Let's assume for the sake of argument that we are making a little mat from the BOM from last week and then I will give you an indication of what else you need to make the runner option. You will need
-your BOM
-a piece of wadding about 3 cm larger than the BOM all around. I have used 272 Thermolam by Vlieseline and you can buy that here.
-something for backing, about 5 cm larger all around than your block
-bias binding either shop bought or made from one of your fabrics.
-water soluble marker

Right. The first thing to do is to make a 'quilt sandwich' and you achieve this by laying the backing fabric right side down, adding the wadding next and putting the patched panel the right way up on top of that...


Pin so that no movement is possible.


This is an easy make because it is so small but never make the mistake of thinking that you can proceed without pins! The fabric WILL creep and it WILL go skew whiff. This is physics and we have to find a way to be okay with it.

I have chosen to channel quilt my mat. This is easy and it looks good but doesn't detract from the patches. Use your dual feel foot (walking foot). Here is mine....


Set your machine up and quilt the first line. I am using the longest seam as a straight point.


Now, making sure that there is no puckering on the front or the back, quilt a second row using the side of the dual feed foot to gauge the width. 


Keep going like this until you have quilted the mat completely.


Time to trim! I like this bit because the project really takes shape when all of the daggy bits are gone. 


Begin by trimming the quilted mat square...


Now find something round and round off the corners with your water soluble marker for an even more retro 70s look....


A cup is good for this and remember that the smaller the item you choose, the sharper the curve and you need to bind this curve in a minute. Go for the saucer if in doubt! Cut the rounded bits off.
Binding now. Take your binding and machine sew it to the top. start by folding a bit under like this....


Lay the binding along the edge of your mat and pin....


Now machine sew going slow and concentrating, especially on the curves. Now before you cuss me out about the curved corners, remember that I could have mitred them! Sew just past the end (over the start bit) and then trim.

Now turn the mat over and hand finish. I know that you can do this by machine but I prefer to hand finish. more control and much neater.


And there we go! A little mat using the BOM for February! 


I made a runner too which meant making three more blocks up and putting strips of grey in between.


You can make your runner as long as you like too by adding more blocks and more grey strips.


I hope that you have enjoyed this make. I will look forward to seeing you again next time...might be time for another bag soon.

Hugs and kisses
Debs
xxx

Friday, 12 February 2016

BOM - February 2016 retro log cabin block

I just had a look at my BOM list and I realised that it has been a short while...ahem...months since I posted a new block of the month for you!


I am looking back in time to the 1970s for inspiration this time. I turned 10 years old in 1979 so this was the era of my childhood and some rather fond memories.


Log cabin blocks have been done before I think you can agree and in all shapes, ways and forms. I am giving it my spin this time by magnifying it and using the centre two rows only. There are no laws about going  bigger though so if you want, say an over sized floor cushion or a quilt with a few very large blocks, this is the way to go.


Sometimes, all you have to do to give a block a modern look is to make it bigger than usual. 

Well, enough chatting and let's get on with it!

You will need four retro looking prints and one solid for this particular trick. Here are my choices.


Begin by cutting a 10 cm x 10 cm square of your solid and another 10 cm x 10 cm square of one of the prints....


Sew them together....


Now we do something weird. We work with 10 cm wide strips but we pay no heed to the length. This is a beautiful method of making blocks which require strips. As long as the strip is LONG enough, you trim the excess away when you have finished. Do I detect smiles and cheers because measuring is at a minimum now? Thought so!

Cut another 10 cm wide strip and make sure that it is long enough and sew it to the top of the first two pieces....


Now trim the end...


Do it again with another strip....


And trim....


You are getting the idea now! As you can see, sometimes you have less off cut. Keep the decent bits anyway and add it to the stash box. Finish up with one more strip to ensure that the centre solid is perfectly enclosed and you are done!


Normally, there would be more of this and you can continue in the same way until it is as big as you want it to be. you can do 'normal' log cabin like this too by the way.

Next week, I will show you how to make this into a mat and a matching runner.


See you then and thank you so much for stopping by! I am off now to start filming and photography for my new eBook with Vivebooks so wish me luck - it has been a bit of time since I fronted a camera! I shall let you know how it all goes next time. eBooks are a fab idea for crafters because they have video tutorials embedded in them so it is like having a teacher with you at all times - and one that you can rewind. Cannot do THAT with a human very many times!

Hugs and kisses
Debs
xxx

Saturday, 6 February 2016

Sassy cosmetic purse

I am addicted to frame purses at the moment. Seems like a harmless enough way to spend my day and it is a lot of fun!


On top of this, I have found really cute ones with twin black faux crystal (well, okay, plastic) hearts on the clasp.


But that's not all - when is it every I hear you say! I have also been sent some very nice Tilda Spring Diaries fabric and the elements have just come together....


To avail yourself of some of this fantastic fabric, Groves in the UK is the place to start. So, what do we need?

-an 8.5 cm purse frame. This is measured hinge to hinge. I have provided a template and if your frame differs, it is very likely that the pattern will not play ball. I got my frames here.
-fat quarter of fabric. Mine is Tilda Sunflower Dove White and you can get that from groves@stockistenquiries.co.uk 
-fat quarter lining fabric. I have used Tilda Emily Pink.
-Fat quarter of H630 fusible interfacing from the trusty folks at Vlieseline.
-black stranded embroidery floss
-pink perle 8 coton
-water soluble marker
Your usual sewing needs.

Begin by printing off the template.....


The scale is 1:1.
Cut it out and use it as a pattern to cut two pieces of interfacing and two of lining. Fuse the two interfacing to the wrong side of the Sunflower fabric....


Trim the outers so that they are the same size and shape as the wadding.


Use the water soluble marker to freehand the embroidery design to the middle front of the untrimmed unit. Keep well away from the the sides.


Using two strands of embroidery thread and a backstitch, stitch the letters and the emoticon. 


Remove the water soluble marker lines. 

Place the purse outer pieces together and pin. Have a look on your template and see where the hinge is marked? Make this mark on the wrong side of one of the outer pieces.

Sew from hinge mark to hinge mark around the bottom only. Use a slightly shorter stitch and of course, skip the cut corners...


Do the same on the lining pieces but this time, leave a gap in the bottom of the lining for turning out later.
Box the corners next on the lining and the outer by pinching the corners....


Then sewing straight across.....


Repeat for the other one and also for the lining. Turn the purse outer the right way and slip the lining over it so that the right sides are together....


Sew around the top from hinge mark to hinge mark.....


I am not going to pretend that this isn't fiddly. You can do it by hand if you prefer.
Turn the purse out through the gap and then close the gap. Stuff the lining down into the outer, gently making sure that the corners are nice and sharp and that everything looks good. Here is what we have now....


Time to sew the purse into the frame. First, whip stitch the purse in, centring everything and making sure that the right bits and pieces line up.....


You can use any old thread for this task. Now it is time to sew it in properly. Use the pink perle coton to sew the frame in using the holes for your stitches.


Pay attention to the back to ensure that you do not have too many unsightly stitches showing. A slight angle when your needle enters the fabric on the lining side will keep these to a minimum.

When the purse frame is secure, cut the whip stitches away. And there we have it! A roomy cosmetic purse with a bit of attitude!


Thank you for joining me this week. Look forward to seeing you here again

With love
Debbie
xxx