My regular readers will know by now that I love it when things are beautiful and practical. Sometimes these things can be shabby and a bit faded and well used (I am trying not to say old here...) but they are still beautiful. Think of old leather bags and wooden things. I think that you see what I mean!
And I have found that it is possible to live beautifully when I have diy in my life. I can control my world because money stops being such a big factor when you have the skills to do something yourself.
I know that we see images of perfection on ads all around us every day. Social Media is full to the brim with people trying to convince us that they have a perfect life. But do you know what? It isn't actually that hard to move towards this loveliness. Change one thing in your environment every day. Maybe buy a houseplant for a dull corner of your room. Tidy each night before you go to bed so that you wake up to a more serene room. Make yourself something to change the way you feel about the morning.
That is actually my point (trust me I do have one) for this week's offering to you. I have a beautiful cup and saucer and I drink pink tea from it. It is a Twinings strawberry and raspberry one and it is bliss! It is just sweet enough so it doesn't need sugar and it stops my cravings for other sweet things.
I have found that if I use a cafetiere with three tea bags in, I can have about four cups. Practical. It fits on my desk better than a round teapot too. Also practical. But do you know what? My cafetiere is UGLY! Functional but not summery enough. I know, more middle class problems.
 |
| Not the worst thing in the world. Just not quite right for the current mood. |
Well, that is the one thing that I will change today. Make that cafetiere less ugly until I can find one that I love to go with my cup and until I can justify the purchase.
 |
| No business hanging out with my pretty cup and saucer! |
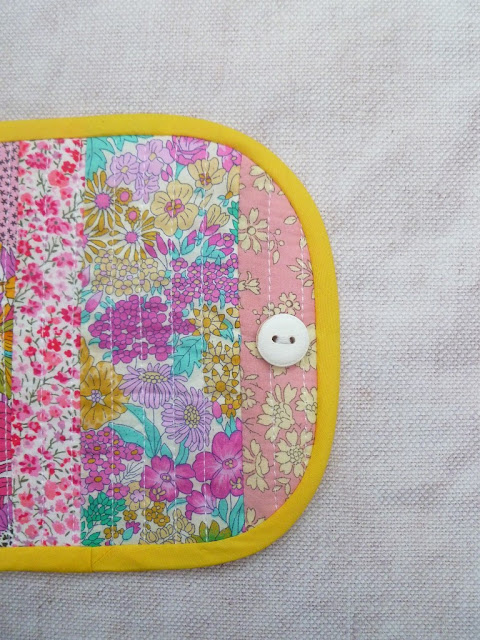
So in the spirit of not spending a huge amount of money and making this better, I am going to make it a little coat. From Liberty scraps. And I shall show you what I do so that you can make one thing in your life better too.
What do we need then?
A few pretty scraps of fabric. I am using the quintessentially English Liberty lawns which are from www.alicecaroline.co.uk. They have a wonderful range and you can buy scrap bags (I know right!) which are the most exciting thing because you never know what you will get.
F8th of fabric for the lining. Liberty again!
F8th of wadding. I am using Thermolam by Vlieseline
a pretty button
Some elastic or cord
a label or similar to anchor the cord
bias binding
Your usual sewing needs
Righto, let's begin be measuring the cafetiere. I want my cover to go around the whole thing and just meet in the handle section. So measure around and add 1 cm (3/8 in). Measure the height and add the same. This will give you a comfortable amount to trim away. You now have a rectangle.
Take the wadding and draw (with a soluble marker), the rectangle that you just measured. This will give you the height and the width plus the extra.
The idea now is to 'colour this in' with the liberty strips. Cut the first strip. It can be as wide as you like but it must be long enough to cover the width of the rectangle like this....
Place the first strip on face up and then channel quilt it.Cut another random strip and this time, lay it over the first with the right sides together and sew the right hand seam...
Unfold the strip. Press it lightly and then channel quilt it too....
Keep going until you have the whole rectangle coloured in....
You could put the backing fabric on at the same time and do the whole thing in one step but I don't like that because you end up with a lot of messy lines on the back from adding the strips. Because this is such a small make, it will be fine like this.
Redraw your rectangle now, cut the front out and round the corners...
Fit it onto your cafetiere (or whatever) and trim if needed. When you are happy, round the corners with something like a small cup and attach the backing fabric.
Bind with your chosen binding....
 |
| Great use for scraps too precious to throw away. |
 |
| The rounded corners make binding a breeze - no mitring! |
I have used a snippet of bright gold bias binding because gold is sort of having a moment right now.
And that's actually it! Go and put that kettle on and grab your current read. I am working my way through Jean Plaidy's Tudor series at the moment.
 |
| LOVE Tudor history! |
I would love to meet Anne Boleyn's ghost just so I could tell her that I believed her and that she was treated awfully.
Well thank you for visiting today and now go out into your world and find something to make prettier. See you next time!
Love and Hugs
Debbie
xx


