
It is their dinky little Create-a-Pincushion! It would be quite rude to ignore it so I thought that I would do as directed and get creating!
I also, by happy accident, happened to have some really pretty Cloud 9 fabrics. I am using one from the Park Life collection.

The great thing about the pincushion to be is that if the top gets a bit nasty or you just get sick of it, you can change the top for another one entirely. There is no gluing so no mess either.

What keeps everything in place is a secure silicone ring and then an acrylic sleeve over the top of that. You can see the silicon ring here...

And if I deconstruct the whole thing like this....

The idea is that you get some fabric and then stuff the pin cushion, put the fabric over the top, trim and then put the sleeve over the top - et voilà! you have a pin cushion. There are some really comprehensive instructions with the kit so it is not hard at all. So, let's have a look at this.

The instructions tell you that lawns and other very thin or thick (denim) fabrics are not so suitable but with a bit of prep, you can still use that coveted scrap of Liberty that you have been saving. Not much can be done for the very thick ones though so perhaps save them for something else.
Once again, Vlieseline saves the day with a scrap of H630. The Cloud 9 fabrics are not very thick and it does take just the right amount of bulk to keep the whole show together. I pressed my square.....
And then fused the wadding to the wrong side....

And I have referred to the fabric as a 'scrap' - but what unit of measurement is that exactly? Well, this little make will not eat into your precious fabrics. I am using a piece 13.5 cm x 13.5 cm and it fits generously.
Next, fill the pincushion body really well with some polyester filling...
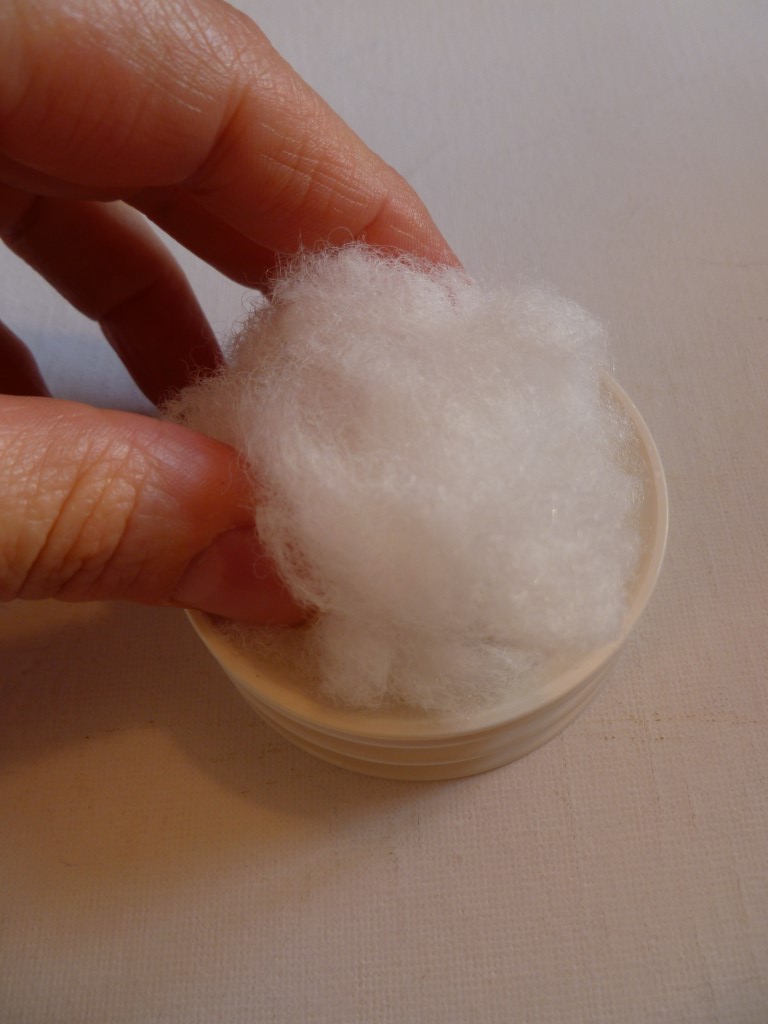
Sorry about the white-on-white photography - it is wildly fashionable so we all have to endure!
Lay the prepared fabric over the top.....

Slip the silicon ring on....

Gently pull the fabric to make it perfect and to get rid of any unsightly pleats. You can bring a motif into the picture this way too.
Trim just under the ring.....

Replace the sleeve....

This is a good make for embroidered or fancy fabrics too and you can let your imagination dictate.
So, now we need a proper list of where we can get our hands on all of these things don't we? Never fear, here it is....
Clover Create-a-Pincushion - groves@stockistenquiries.co.uk 01453 883581
I like this product because it feels great quality. It is heavy and stable and it holds a lot of pins. You could make it with un-soaped steel wool inside too and then your pins with stay beautifully sharp. I am planning a few fro stocking fillers come Christmas time - sorry but it isn't as far away as we would like!
Thank you so much for stopping by and I hope that you have enjoyed this post
Love and hugs
Debbie
xxx
Disclaimer: this product was given to me in exchange for an honest review.
No comments:
Post a Comment
Thanks for stopping by - I would love and welcome any feedback. Debs xxx