
Spring is well and truly here so I thought that it was time for something floral. And because you are all my very favourite people, I have a giveaway too - a bundle of NINE Tilda fat quarters from the very new Spring Diaries collection! Utter fabulousness!

All that you need to do to enter is to leave a comment under this post in the usual way and I will pick a winner randomly on April 30th. You can enter any time up until then. Good luck!

So back to that something floral! I like practical things that are pretty too and I thought that it may be time to have another look at bum bags - what an awful name but we are stuck with it I am afraid. Fanny pack isn't much better!

I have made this little bag with the Spring Diaries fabrics and I have put the stockist info at the bottom of the post just in case you need it.

But we will need a few other things of course and here is the list....
-fat quarter pack of Tilda Spring Diaries. You will have heaps left over too if you have the whole pack. (Groves)
-3 x 18 cm zips. Choose them to coordinate with your fabric choices.
-Kam snap
-Fat quarter H630 fusible fleece (Vlieseline)
-a medium sized scrap of Decovil I Light (Vlieseline)
-crochet flower. You can cheat and buy these online or
-pretty button to put onto the flower
-some coordinating beads
-webbing
-buckle set
-fray stopper
-thin double sided tape
Your usual sewing/bag making needs
To begin with, here is your pattern. when you print it off, it should measure 43 cm x 16.5 cm.

It is the same one for the front, back and lining. The rest of the needs are given in the pattern as they come up.
Let's start with the back so that we can see how to put these zips in.
Please don't be afraid of the zips. It really isn't very difficult and I will attempt to lead you gently through the procedure. Okay, are you ready? Let's get going!
To begin with, cut four things out using your template. You will need an outer, two lining pieces and a piece of H630 fusible fleece. Fuse the fleece to the wrong side of the chosen outer panel...

Put that aside for the moment and also one of the lining pieces and work on the other piece of lining. Fold the lining in half and make a crease....

Now measure down 3.5 cm on the wrong side of the lining and draw a box which measures 1 cm wide x 18 cm long....

Draw a second line in the middle of the box with angled bits at each end. This is to be your cutting line so you can ignore it for the time being but here is what it looks like...

And the angles...

Those angles are important because they help the fabric to lay flat and stop puckering in the corners when you turn everything the right way out.
Place the outer and the lining right sides together, line everything up and pin. Sew around the outer box only...

Cut along the middle cutting line including the angled bits being very careful not to cut your stitching....

Now 'post' the lining through the box...

Smooth everything flat and press. This is what you have now....

And the front...

Baste or use thin double sided tape (my personal favourite) to put the zipper into the lining side making sure that the opening is the right way (usually to the left)....

Swap to a zipper foot and sew the zip in by top stitching around it....

That's it! You have just put in a zipper - nothing to fear at all!
To make this into an actual pocket, take the other piece of lining and place it right side up onto the back of your zipper panel and baste all around the edge. Trim the layers to the same size.
Hand basting is really useful, you will have a fair few layers to this bag and they will shift. basting as you go along helps everything to behave.
To finish off, I made a label from the ribbon that was tying up the fat quarter bundle and attached it under the zipper...
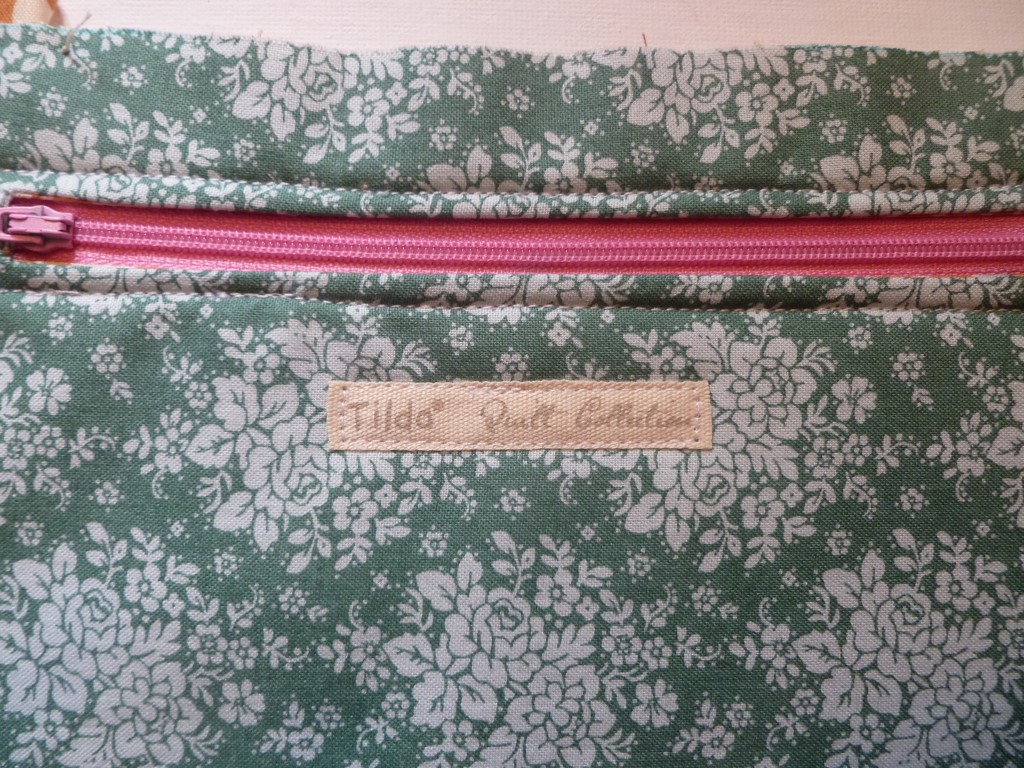
If you do this, attach it before you baste the pocket lining in. I treated the ends of the ribbon with some fray stopper and then placed it with double sided tape to ensure that it was perfect before sewing. This is optional though and you can also choose to put it inside the bag.
Make the front next. Choose a fabric and cut the front panel. This one will also need an outer panel, two lining pieces and a piece of fusible fleece. Fuse the fleece to the wrong side of what will become the outer panel.
Make the front panel exactly as you have the back one. I have put a little patch pocket on the front too. Choose a fabric and cut two rectangles 10 cm x 7 cm. Place them right sides together and sew around the outside leaving a gap...

Clip across the corners to reduce bulk...

Turn out through the gap and then press carefully to keep a perfect shape. Push the corners out carefully to keep them sharp.

Top stitch along the top edge...

I keep the gap to the bottom at this point - when you sew the pocket into place in the next step, the stitching will close the gap as you go....

Use double sided tape to site the pocket 4 cm below the zip and slightly to the right of centre. Sew on with a double row of stitching...

You may wonder why the pocket is not central? It will become apparent when we add the flower charm. I didn't want the pocket to be cluttered by the charm hanging over it and getting in the way. Slightly offsetting the pocket does the trick!
Make a flap measuring 10 cm x 4 cm and sew it the same way. Attach this over the top of the pocket and keep it all closed with a Kam snap.

The top zip is a slightly different kettle of fish to the other two that we have installed but it is still easy. To begin with, cut two more pieces of fabric for the main bag lining using your template (I did say that there would be a few layers!).
Fold them in half and mark the centre of the lining with a crease, mark the centre of the front outer and fold the zipper in half and mark the centre of that too...

Line all of these markings up with the zip facing the right way (opening to the left) and the outer and lining right sides together and the zip sandwiched in the middle...

Pin and then baste (I always baste if I cannot use double sided tape to ensure that no pins are in the way when I put the zip in).
Sew along the seam to the end of the zip only...

Open out and top stitch along the zip...

This keeps the lining down. As you can see, The top stitching for the top zip is exactly on top of the top stitching for the front and back zips. Go slowly and keep it neat because your stitches are on show.
Repeat all of this for the back panels and the other piece of lining. And before we go any further, I have added a little patch pocket (without the flap and snap) on the lining too. You can omit this but if you do it, this has to be done before you put the top zip in...

You now have a sort of a bag taking shape - who know that there were so many steps! Never fear, the worst is over.
Baste all around the bag. There is a bit of weirdness at the ends of the zip too but this will be taken care of in a minute.

Just manipulate the fabric gently to get it as flat as possible and baste.

The next step is to bind those raw edges. I have used one of the fabrics in the FQ pack to make bias binding but if you don't want to do this, you can use shop bought too. Either one will work.
Start at one end of a zip and bind all the way around the bag, enclosing any weirdness....

Finish at the other end of the zip. The photo shows as short piece of binding - this is to show you the overlapped beginning end. Your binding will need to be large enough to go all the way around the bag.

And here is the back view.


Okay, Strap time! I have some webbing strap which is 2.5 cm wide and the perfect pink for the fabrics. You will need your buckle too. If your strap is extra long, it is a good idea to have a tri-slider too to carry the excess. Mine isn't so I am not using one. You can buy these where you buy the buckles (online and at good craft stores - they even come in other colours!).
Start by treating the cut ends of the strapping with Fray Stopper BEFORE you cut. This means that you won't lose any of your strap.
To anchor the strap to the front of the bag, a couple of small tabs are needed. Choose your fabric and cut two squares 6 cm x 6 cm. This is slightly larger than needed and gives us something to play with. cut two pieces of Decovil I Light from your scraps 4 cm x 4 cm. Lay a Decovil square onto the centre of the wrong side of the fabric with the glue side down and fuse....

Repeat for the other one. Fold the edges in and make them as perfect as possible. Use double sided tape to stick the end of the webbing strap to the corner of the bag....

Sew the tab over the top on one side, trapping the strap inside. Sew around twice for strength.

The other side is a little different. You will need this half of your buckle...

Cut a piece of strap about 15 cm long and fold it in half with the buckle inside. sew both ends under the tab....

Sew doubly as you did on the other end. Weave the other end of the strap through the other half of the buckle...

Job's done! Only thing left now is the bag jewellery...I like to choose a few pretty and coordinating beads to give my crochet flower a bit of extra oomph.

Then secure it to the front pocket zipper pull, weaving through the beads a few times for extra security.
And it's a wrap! Here is the stockist info so that you can get going on your own masterpiece:
Tilda fabrics -groves@stockistenquiries.co.uk 01453 883581
I made this on my incredible -Janome Horizon Memory Craft 8200 QCP Special edition
sewing machine from www.janome.co.uk
Those fantastic interfacings -Vlieseline from www.vlieseline.com Ph
01453883581 crafts@stockistenquiries.co.uk
But most importantly of all, don't forget to enter the free giveaway. Remember, simply leave a comment below and I will use a random number generator (you know the usual deal) and I will choose a lucky winner from the comments list. Here is that prize again....
There are NINE fat quarters in that pack!
Thank you so much for stopping by and staying with me on this incredibly long post! This very practical little bag is worth the work though and it will earn its keep time and time again.
See you next time!
Love and hugs
Debs
xxx
No comments:
Post a Comment
Thanks for stopping by - I would love and welcome any feedback. Debs xxx