 |
| This bag is just crying out to be taken to market! |
 |
| The details are all important in bag making. |
Most of the scary things focus around zippers you will not be surprised to hear but just lately, I have been getting a few questions from people about boxing corners on bags. What is it? Is it hard? Why do we do it?
Boxing corners is the procedure of cutting a square out of a lower corner (I know sounds a bit scary but bear with me) and then pinching the seams together and re-sewing.
 |
| As you can see, the boxed base gives great volume without the need for a gusset. |
It is not hard to do at all and the reason that we do it is to add instant volume to a bag without having to fuss around adding side panels and gussets. These have their place too as do darts but nothing will turn your beloved creation from a flat piece to a real life bag like boxing the corners.
You cannot box the corners on a pattern unless the pattern is written for it because the corners must be allowed for in the measurements and the designer has to calculate this accurately. So unfortunately this is not one of those things where you can easily adapt an existing pattern.
 |
| Those extra wide straps make the bag easier to carry fully loaded. |
Still, most good patterns have these features and the great news is that they are especially good for beginners! So let's get started!
You do not need anything at all apart from your pattern, a ruler and some sharp scissors to box the corner on your bag. I will be referencing my latest pattern, the Toulouse French Market Bag for this but the procedure is the same for any other patterns so you can transfer the skills easily.
The time for boxing corners comes when you have sewn the bag front to the back. You will have a situation like this...
 |
| You will have a regular seam to work with. The extra stitching that you see is from basting the bag front and back to the foam interfacing. |
Now the first bit is scary because it feels as though there is no going back. You have to cut a corner from the bag. To begin with, the patterns will tell you what to do. For example, the Toulouse pattern tells you to cut a 2 1/2" square. Firstly, you draw it in....
 |
| Remember to measure twice (at least!) and cut once. |
Use your water soluble marker or whatever you are comfortable with and make sure that the squares are the same for both corners.
When you measure the cutout, measure from the edge of the bag NOT the seam.
When you measure the cutout, measure from the edge of the bag NOT the seam.
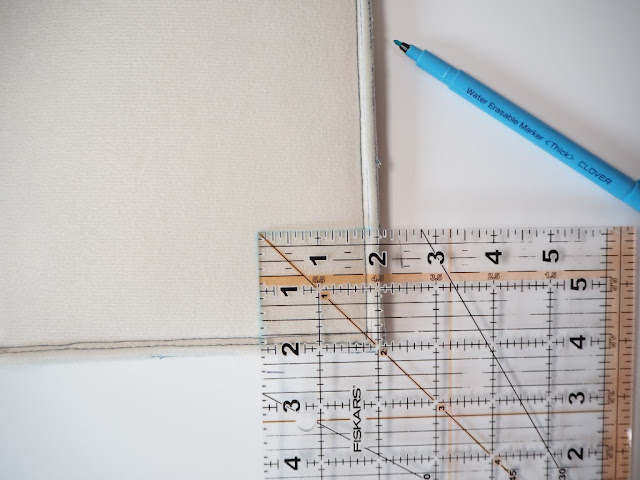 |
| A water soluble marker and a good clear ruler is your best friend here. |
So when you have measured and checked, cut the corner out...
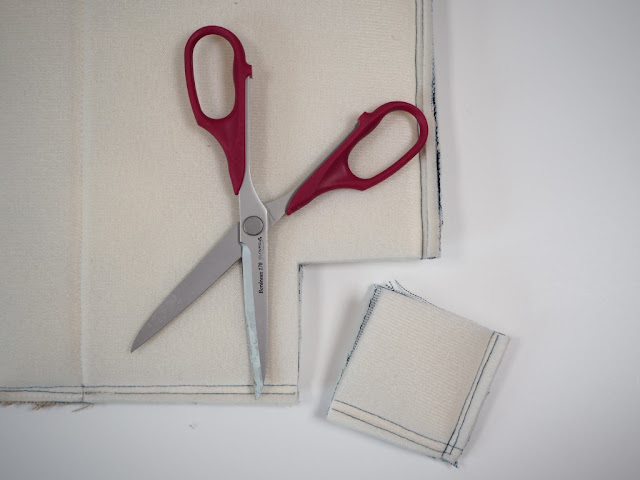 |
| This is the scary bit but your pattern will tell you what to do and as long as you measure carefully and understand the procedure, it is easier than you think. |
The first thing that you will find is that the seam wants to come undone because you have essentially cut through the stitches. You can combat this by re sewing the seams near the cutout. With more experience, you can also anticipate where the cutouts will be going and shorten the seam length in that area. This helps to stop the stitches unravelling.
Now the next bit is where you have two seams - the one on the bottom of the bag and the one on the side. Pinch them together and pin or clip...
 |
| Make sure that there is no puckering on the right side. Come in from the bag top and slide your finger across the corner to make sure everything is nice and neat. |
There are a couple of things to know here. Number one, the more precisely you bring the seams together, the better the outside of your bag will look and the best way to achieve precision is to open the seams out.
 |
| A clip is better than a pin here because you can use it to keep that seam open and flat |
Okay so the next job is to sew the new seam and create the boxed base. Do this by sewing along and back stitching at the beginning and end of the seam...
 |
| I always shorten my stitch length just a bit because it helps to make the corners stronger. A generous seam allowance will make sure that you have caught all of the layers too. |
That is actually all there is to it! Check your seam from the outside and the corner should look something like this....
 |
| Precision is worthwhile in bag making. Certain things that you do will draw the eye. |
If the seams are off, it doesn't look great so be prepared to unpick (don't worry, it happens to all of us because fabric shifts thanks to physics).
Repeat this for the other corner and also for the lining.
 |
| This one again! But it is worth repeating. Learn how to do this and you will not look back. |
This is an essential bag making skill and once you can do it reliably, it will make a huge difference to the quality of your makes.
Thank you so much for dropping by and don't forget, if you like the look of the Toulouse French Market Tote, you can find it in my Etsy shop. Have a look at the page Buy My Patterns and you can see what else is on offer and what is coming up soon too.
 |
| Thank you for your visit and I hope that you found this post helpful! |
See you soon and thank you so much for your visit!
Happy sewing!
Hugs
Debbie
xx
No comments:
Post a Comment
Thanks for stopping by - I would love and welcome any feedback. Debs xxx